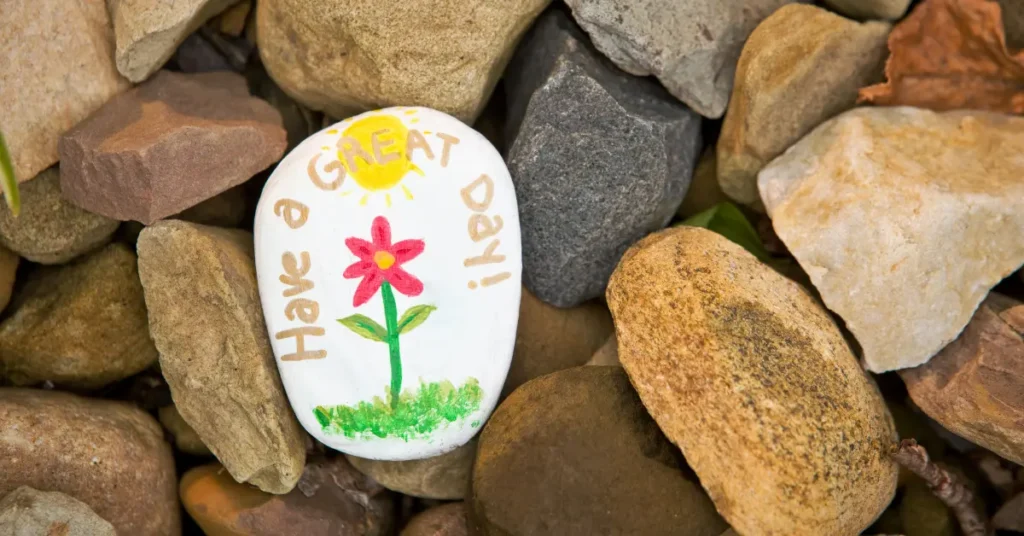
There is a unique kind of magic in finding a splash of bright, hand-painted color hidden in an unexpected place. If you’ve ever stumbled across a beautifully painted stone tucked into the fork of a tree or nestled near a park bench, you know exactly how it instantly brightens your day.
But once you’ve finished prepping, painting, and sealing your own batch of masterpieces, a new question pops up: Now what do I do with them?
Hiding your painted rocks is half the fun of this incredible hobby, but it requires a little bit of strategy. How do you find the perfect hiding spots where eager searchers will actually spot them? How do you keep them safe from lawnmowers?
Whether you’re hiding them for a dedicated community treasure hunt, dropping them to boost a local initiative like Belleview Rocks, or just wanting to leave a little kindness behind on your morning walk, this guide will cover it all.
Grab your basket of finished stones, lace up your walking shoes, and let’s dive into the best places, clever tips, and the essential etiquette for hiding your painted rocks!
Finding the perfect hiding spot is an art form in itself. You want a location that strikes the perfect balance: hidden enough that it feels like a discovery, but visible enough that it won’t sit unnoticed for months.
The easiest rule of thumb to follow is simply to hide them where life happens. Think about your own daily or weekly routine, the places you already visit the most are usually the best spots to start dropping your art.
Here is a breakdown of creative, high-traffic hiding spots where your rocks are guaranteed to catch someone’s eye, whether you’re right here in town or exploring surrounding areas.
Parks are the natural home for painted rocks because people are already walking slowly, looking around, and enjoying nature.
The Dock: Placing a bright rock on a scenic overlook or a lake dock is a surefire way to get it spotted by someone stopping to look at the water. Try the dock at Lake Lillian! Outside the nearby Splash Pad could also be a fun idea.
Along Walking Paths: Nestling a colorful stone right at the base of a prominent tree trunk or on top of a bench or picnic table along a walking path is perfect. Eager kids and walkers look at these spots constantly. Lake Lillian has the paved walking path around the lake as well as the extended dirt path across the street.
Anywhere people are running errands or waiting around is prime territory for a little unexpected joy.
Outside the Grocery Store: The benches, planters, near trees, or small outdoor tables outside of places like Publix, Walmart, and Dollar General are fantastic. People are constantly walking past or sitting down for a moment while loading groceries.
Shopping Center Walkways: Think about the heavy foot traffic outside of spots like Dollar Tree or the pedestrian walkways leading into favorite local restaurants like Pasta Faire. A rock placed neatly on top of existing rocks or next to an outdoor planter will easily catch the eye of a hungry diner or shopper.
Don’t overlook the boring, everyday stops on your to-do list. They often have the highest foot traffic in town!
The Post Office: Dropping a rock on an outdoor ledge or next to the main entrance of the local Post Office ensures hundreds of people will walk past it daily.
Your Own Neighborhood: You don’t even have to leave your subdivision to spread some happiness. Try placing a rock at central neighborhood gathering points, like right next to a cluster of community mailboxes or near the local playground equipment.
To make sure your rocks are actually found and enjoyed, keep these quick tips in mind:
Keep it at Eye Level or Lower: Eager rock hunters (especially kids!) are usually looking down at the ground or at waist height. Avoid hiding them way up in high tree branches where no one is looking.
Make Colors Pop: If your rock has a green background, don’t hide it deep in the green grass, it will blend right in. Place dark or green rocks on light concrete walkways, and bright pink, yellow, or white rocks against darker tree roots or mulch beds.
Protect the Landscapers: Never hide rocks directly in tall grass where a lawnmower or weed-whacker could hit them. Not only will it destroy your artwork, but hitting a rock with a commercial mower blade is incredibly dangerous for the landscaper! Stick to hard surfaces, mulched beds, or the bases of trees.
While spreading joy around your hometown is incredibly rewarding, you don’t have to limit your hiding to just one area.
Take a little bag of painted rocks with you whenever you travel or run errands in surrounding communities. Dropping rocks around bustling spots in Ocala, near the busy town squares in The Villages, or throughout Summerfield expands your reach and introduces whole new groups of people to the hobby. You might even inspire someone a few towns over to start painting their own!
While the main goal of this hobby is to spread joy, there is a fine line between a delightful community art project and accidental littering (or worse, a safety hazard). Even though it feels like you’re just dropping off a harmless piece of painted stone, local authorities, park staff, and business owners sometimes see things a bit differently.
To keep our hobby on everyone’s good side, here are the crucial ground rules on where not to hide your painted rocks.
This is the number one rule of rock hiding: Never, ever hide rocks in tall grass, active lawns, or open fields.
Think about the local city crews keeping our parks clean, or the landscapers maintaining commercial plazas. If a commercial lawnmower or weed-whacker hits a hidden rock, it can shatter your artwork instantly. Worse, that spinning blade can turn your rock into a dangerous piece of shrapnel traveling at incredible speeds, risking serious injury to the operator or anyone walking nearby.
Where to go instead: Stick to mulched flower beds, concrete ledges, benches, or the immediate, visible base of large trees where mowers don’t go.
If you are visiting beautiful natural gems nearby, like Silver Springs State Park or the Ocala National Forest, it can be incredibly tempting to leave a colorful “kindness rock” along the beautiful trails. However, this is actually a major faux pas in the outdoor community.
State and National Parks strictly enforce a philosophy called Leave No Trace. The goal of these protected areas is to preserve nature exactly as it is, completely untouched by human hands.
Why it matters: To park rangers and environmentalists, a painted rock left in a pristine forest or near a crystal-clear natural spring is considered litter, no matter how beautiful or well-intentioned the artwork is.
The Global Rule: This applies tenfold if you take your rock-hiding hobby on vacation to major bucket-list destinations like Yellowstone or the Grand Canyon. Leaving painted rocks in National Parks can actually land you a hefty fine for littering or vandalism. Keep the natural areas natural, and save your rocks for urban spaces!
While hiding a rock outside of a store like Publix or Dollar Tree is fantastic, don’t bring them inside the store.
Placing a painted rock on a grocery store shelf, inside a freezer door, or mixed into clothing racks might seem cute, but it creates a headache for the employees. Store managers often have to treat unknown objects left on shelves as potential safety hazards or abandoned property, meaning your beautiful rock will likely just get thrown straight into the dumpster at closing time.
A good rule of thumb is to avoid anywhere where people need privacy, quiet, or where security is tight.
Cemeteries and Memorials: Unless you are leaving a rock specifically for a loved one’s resting place, general rock hunting shouldn’t happen here. It can disrupt people who are grieving.
Driveways and Walkway Obstacles: Never place a rock directly on a driving path, a parking space, or right in the middle of a narrow walking steps where someone could trip over it in the dark.
When in doubt, ask yourself: Will someone have to move this rock to do their job, or could this rock hurt someone? If the answer is yes, find a different spot. By keeping our rocks in safe, high-traffic, urban-friendly locations, we ensure that the community continues to love and welcome our painted treasures!
One of the absolute best feelings in this entire hobby is the moment you get a notification showing that someone found your rock! Watching a stranger post a photo of your artwork, especially a smiling face or someone who genuinely needed a little brightness in their day, makes the entire process so rewarding.
If you just drop a rock into the world without any labels, you’ll rarely find out where it ended up. But with a few simple tracking tricks, you can turn your painted stones into an interactive community treasure hunt.
Here is how to set up your rocks so finders know exactly how to report their discoveries!
Before you seal your rock, you need to flip it over and write a quick, clear note on the back so the finder knows what to do. Because space on the back of a stone is limited, keep it short and sweet.
Using your fine-tip paint pen or fine-line marker, write something like:
“Keep or re-hide! Post a pic to BelleviewRocks.com”
“You found me! Share on Facebook: Belleview Rocks”
“Track this rock! Use hashtag #BelleviewRocks”
We are incredibly lucky to have a couple of dedicated local hubs right here in our community where finders love to share their catches. Be sure to direct people to these specific spots:
The Official Website: Eager rock hunters can head straight to BelleviewRocks.com to upload photos of their finds. (Note: I’ll be releasing a complete, step-by-step guide in the near future breaking down exactly how to easily upload and log your found rocks on the site, so stay tuned!)
The Facebook Group: Our local Belleview Rocks Facebook group is an amazing, bustling community of painters and finders. It’s the perfect place to post a quick smartphone photo the second you spot a hidden gem around town.
The Universal Hashtag: Tell your finders to use the hashtag #BelleviewRocks on whatever social media platform they prefer (like Instagram, TikTok, or Facebook). That way, you can easily type the hashtag into a search bar and see every single post associated with our local project!
Writing legible website URLs on a bumpy, dark rock surface can be a little tough. If your handwriting is a bit shaky or you have a massive batch of rocks to prep, you can actually buy sheets of small, printable clear sticker labels. Another great idea is a getting a small label maker!
Just print your tracking instructions, website link, and hashtag onto the labels, stick them firmly to the back of your prepped rocks, and then apply your Liquitex Satin Varnish right over the sticker! The sealer will lock the label into place, making it fully waterproof and perfectly readable for whoever finds it.